

If you want to collect every safe and unlock the No Safe is Safe trophy, this guide lays out All Safe Locations & Codes I used on Casual/Normal difficulty. I walked every room where a safe hides and noted the exact combos and the practical tips for getting to them without drawing unwanted attention. Use the locations below to clear every safe and finish that completion requirement.
Quick checklist
- Keyphrase: Safe Locations & Codes Resident Evil Requiem
- Trophy goal: Open every safe to unlock No Safe is Safe
- Platforms: PS5, Xbox Series X|S, PC, Nintendo Switch
- Note: Codes can vary by difficulty (Casual, Normal, Insanity). I list the Casual/Normal combos I encountered and call out tricky encounters.
Safe 1 — Bar and Lounge
This one is one of the easiest to miss if you breeze past the bar. Head all the way left and go behind the bar counter. The safe sits within easy reach directly behind the bar.
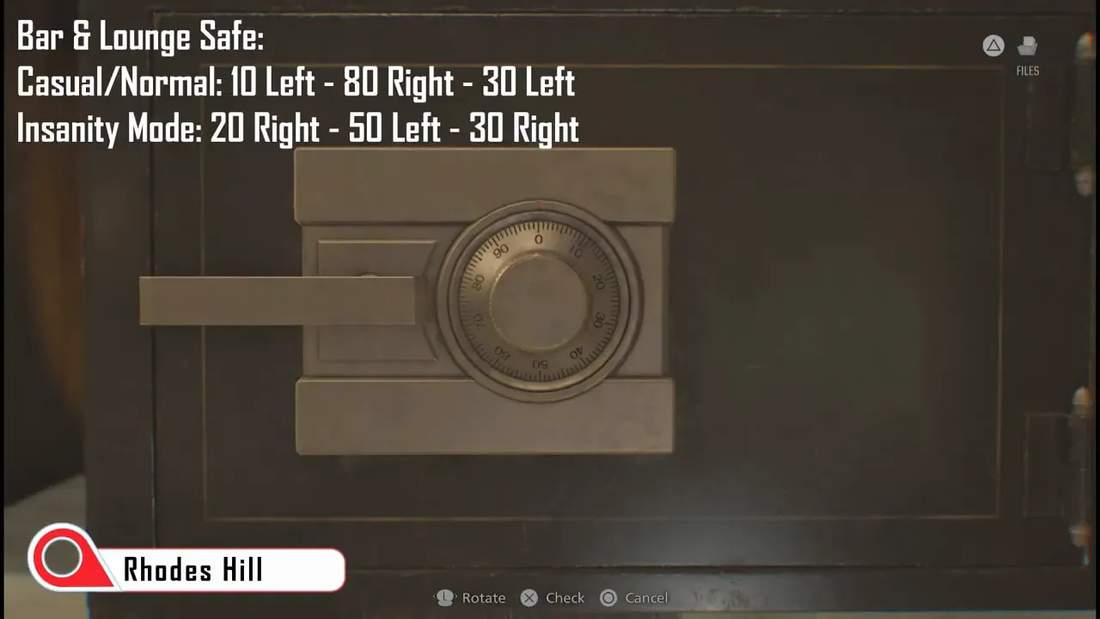
Casual/Normal code I used: 30 left
Open it and collect the contents. It’s a small but useful reward early on, and it sets the tone for clearing the rest.
Safe 2 — Examination Room
The second safe is tucked away in the examination room. Look in the back corner inside the cabinet—this is a classic tucked-in-place safe, so check the cabinets before assuming the area is clear.
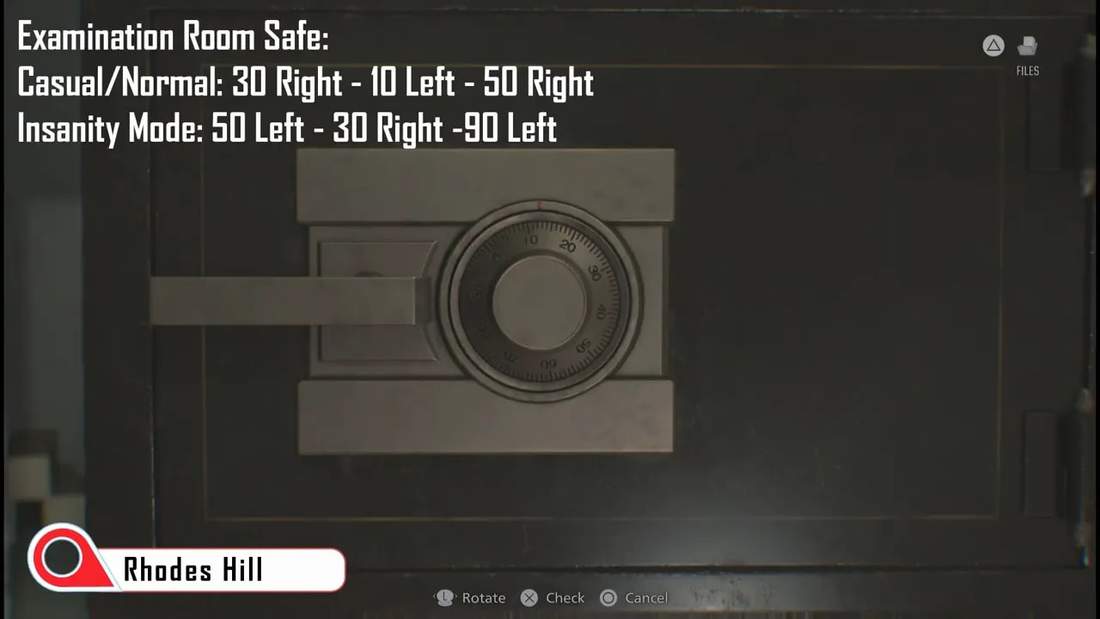
Codes vary by difficulty, so use the combination for your mode. On Casual/Normal I used the in-game combo shown for that difficulty. The cabinet is small, so approach carefully and open it to add another piece of loot to your inventory.
Safe 3 — Basement (Left of the Workshop)
This safe sits on a table in the little room to the left of the workshop. There’s also a document and some scrap nearby, so take a moment to grab those while you’re here.

Casual/Normal combo I used: 60 right, 40 left, 80 right
That one gave a fun little surprise: a Mr. Raccoon poster and some ammo. Always worth opening for the collectibles and supplies.
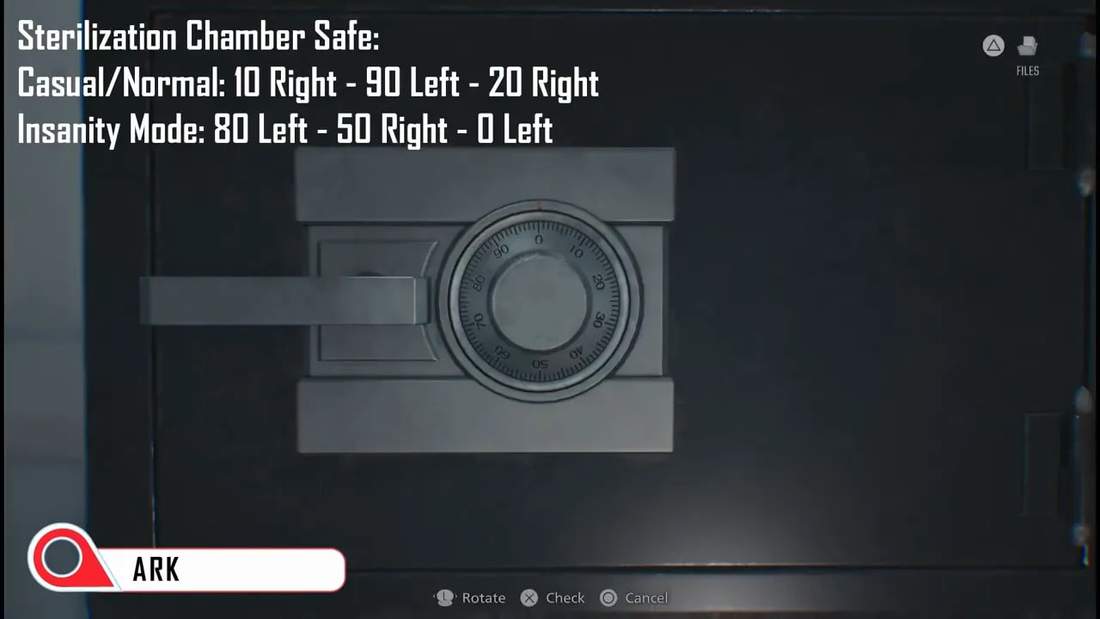
Safe 4 — Sterilization Chamber (Watch the Liquor)
This safe is in the sterilization chamber, which is also home to a liquor. Getting to the safe quietly is the tricky part. There’s broken glass on the floor here, so avoid noisy footsteps and use the environment to your advantage.
Tips for getting in and out:
- Wait for the liquor to move away before creeping in.
- Use a glass bottle or other distraction if you need to lure it away.
- Back away carefully if the liquor turns toward you to avoid stepping on the broken glass and alerting it.
Enter the code for your difficulty. Be fast and precise; once the area is clear you can grab the safe contents and move on.
Safe 5 — Monitor Control Room (Final Safe)
The last safe is in the monitor control room. It’s tucked toward the back of the room—look behind the monitors and around the equipment to spot it.
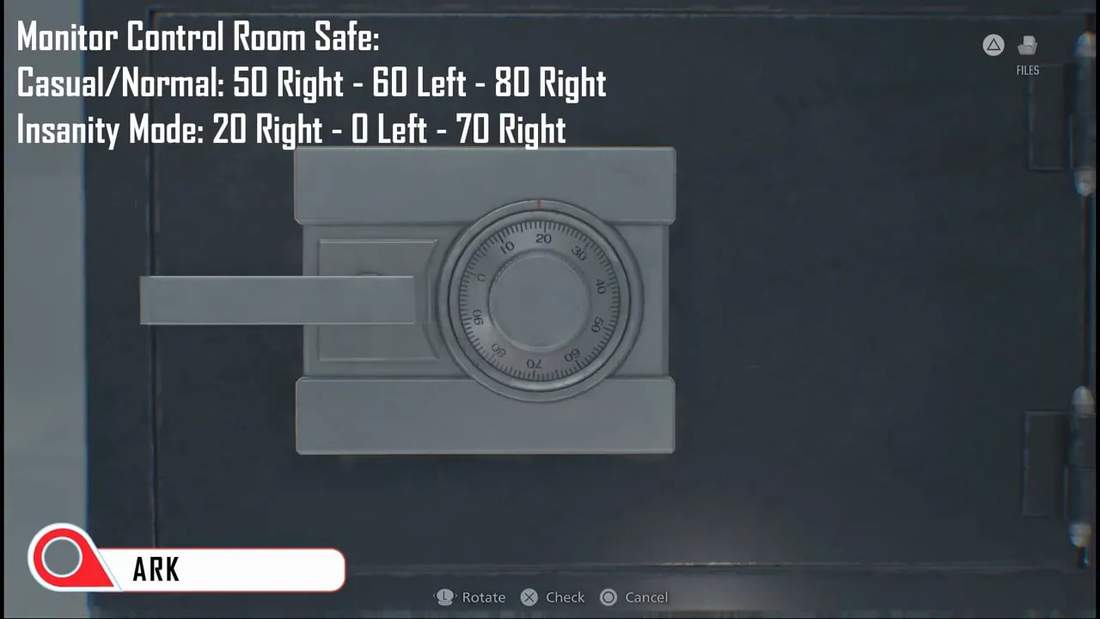
Enter the correct combination for your chosen difficulty and the safe will open. Opening every safe across the locations above will trigger the No Safe is Safe trophy once the final safe is unlocked.
Final tips for collecting all safes
- Check cabinets and corners: Several safes are hidden inside cabinets or behind counters, so scan thoroughly.
- Mind enemy patrols: The sterilization chamber is the most dangerous area; use distractions and patience.
- Keep difficulty in mind: Codes change between Casual, Normal, and Insanity. If you play Insanity, expect different numbers.
- Save after big hauls: Some safe rewards include ammo or useful collectibles—save if you can after opening multiple safes.
Recap
The five safes are located in the Bar and Lounge, the Examination Room, the Basement left of the Workshop, the Sterilization Chamber, and the Monitor Control Room. Use the combos above for Casual/Normal runs and remember to adapt if you are on Insanity. With these Safe Locations & Codes Resident Evil Requiem notes, you should be set to clear every safe and claim the No Safe is Safe trophy.
Good luck out there. Open every safe and enjoy the rewards.