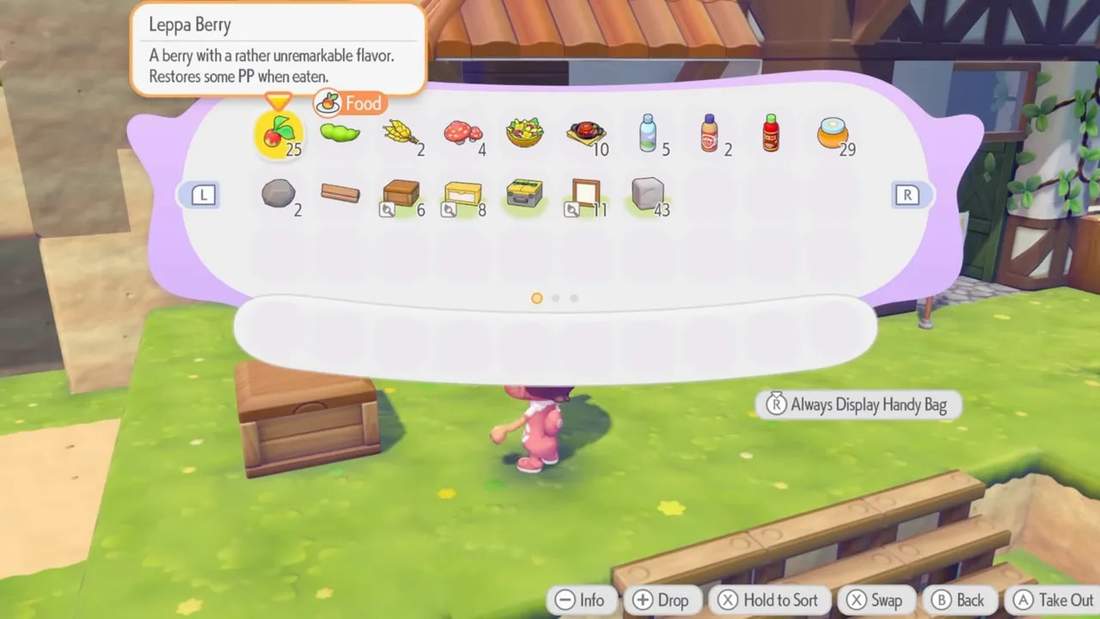
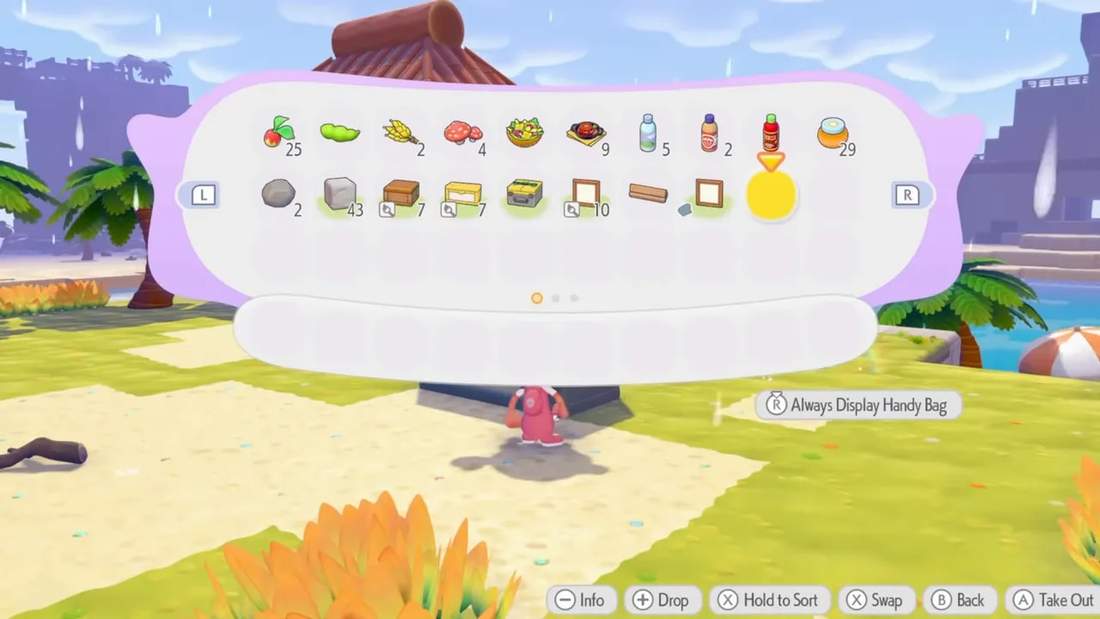
If you’re anything like me, a cluttered inventory is enough to make you lose your mind. And in Pokémon Pokopia, there are so many items to collect that disorganization sneaks up on you fast.
One minute you’re holding a few rocks and sticks. The next minute you’ve got flowers, fossils, CDs, comfort items, building blocks, décor, toys, crafting materials, and a random pile of who-even-knows-anymore stuffed into your bag.
So if you’re ready to get those items out of your inventory and into something that actually makes sense, here’s a full guide to storage in Pokémon Pokopia. I’m covering the storage chest options, how storage works with crafting tables, and a couple of practical storage builds you can use depending on whether you care more about pure function, aesthetics, or both.
Storage chest options in Pokémon Pokopia
There are two main craftable storage chests to know about early on, and the difference between them matters a lot once your item collection starts ballooning.
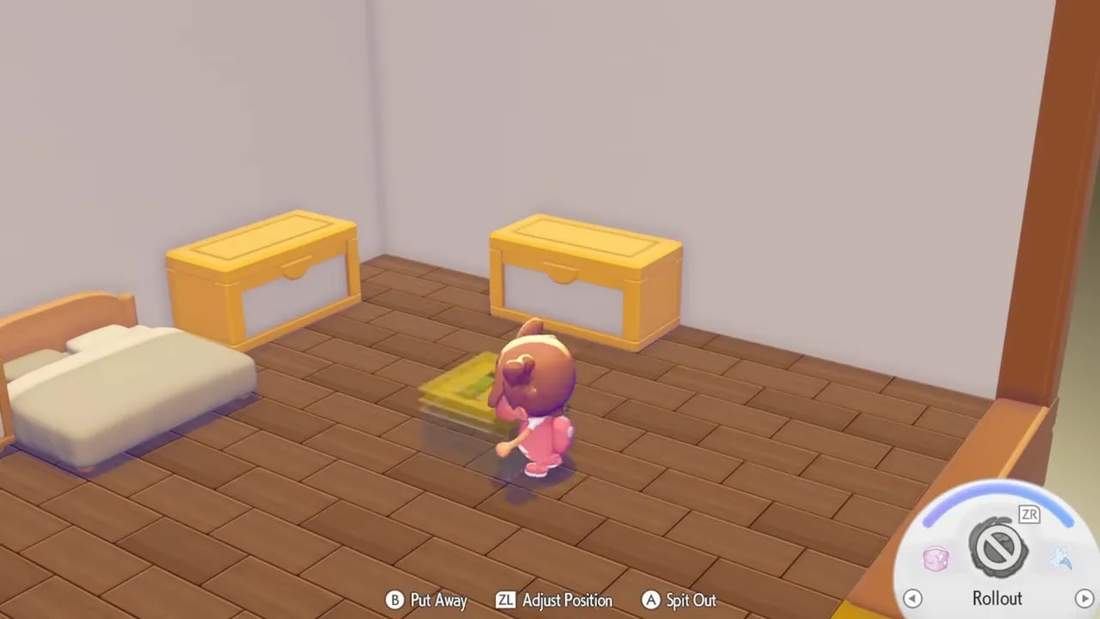
1. Wooden Storage Chest
This is the basic chest. It’s the easiest one to start with, and it gives you around 20 storage slots.
At first, that sounds decent. In practice, it fills up very quickly. Once you’re gathering materials consistently, 20 slots starts feeling tiny. If you lean on these too heavily, you can end up with a bunch of small chests scattered everywhere, and then you’re back in chaos mode trying to remember what’s inside each one.
2. Large Storage Chest
This is the one I recommend building toward if you want an actual long-term storage solution. The large chest has about 60 storage slots, which makes it way more useful for organizing categories of items instead of constantly splitting things across multiple containers.
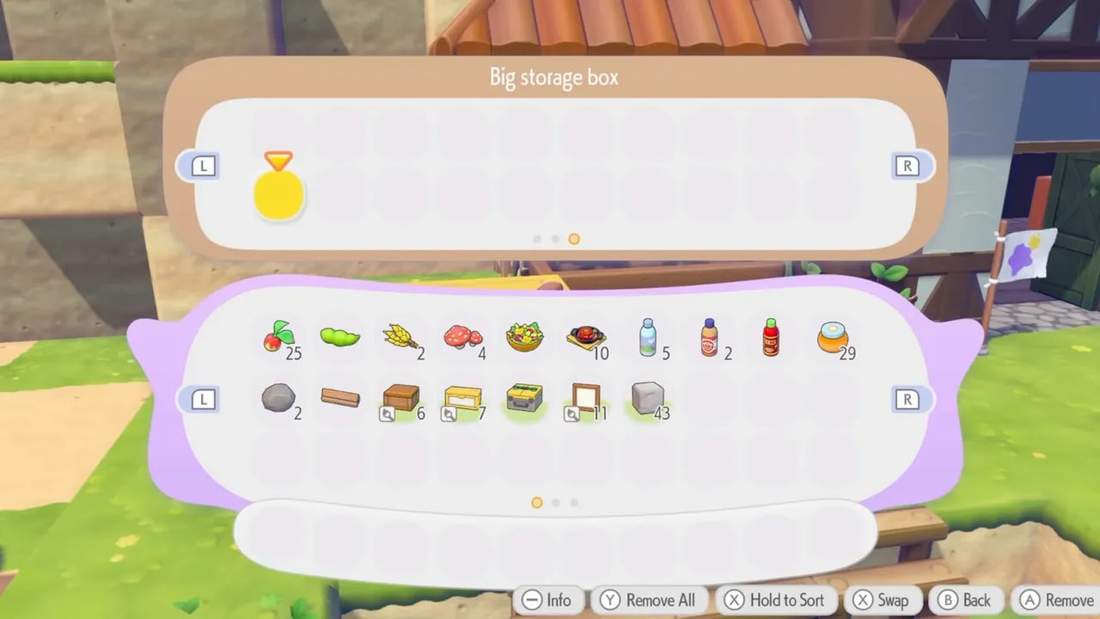
To unlock the recipe, you need to welcome 30 Pokémon to your island. Once you reach that milestone, you gain the ability to craft the large storage chest.
The catch is that it requires Poké Metal. Each large chest costs 3 Poké Metal, so while it’s absolutely the better storage option, it can be expensive if you want to build a full storage room right away.
Poké Metal becomes easier to collect later in the story, but early on, it’s still something you’ll want to budget carefully.
Other furniture pieces can also function as storage
Even though the two standard storage chests are the main focus, there are also furniture items that can access storage, like an end table. If you want to experiment with a more decorative setup, that’s an option too.
One big limitation of storage right now
Before getting into layouts, there’s one important thing to understand about how storage currently works in Pokémon Pokopia.
Storage is not shared globally across areas.
So if you place storage chests in one region, you can’t access those same chests from another part of the world. For example, if you’re standing in Withered Wasteland, you won’t be able to use a chest you placed over in Bleak Beach.
That means storage placement actually matters. You’re not just building for looks. You’re building around travel flow, convenience, and how often you return to a specific area.
Why I recommend two separate storage setups
Personally, I think it helps to think of storage in two categories:
- Crafting/resource storage
- General item storage
These serve different purposes, and separating them keeps things much cleaner.
Crafting storage
This is for your practical materials like:
- Rocks
- Sticks
- Clay
- Iron
- Other recipe ingredients
The goal here is simple: keep anything used for crafting close enough to your workbench so the game can pull those resources automatically.
General item storage
This is where everything else goes. Decorations, flowers, toys, CDs, fossils, furniture, comfort items, home-building objects, and all the miscellaneous things you collect along the way.
Trying to mix all of that together with your crafting materials gets messy fast, so splitting the systems makes life easier.
How crafting table storage works
This is one of the most important mechanics to understand if you want your setup to feel efficient.
A crafting table pulls resources from storage chests, but only under certain conditions.
If your crafting table is out in the open
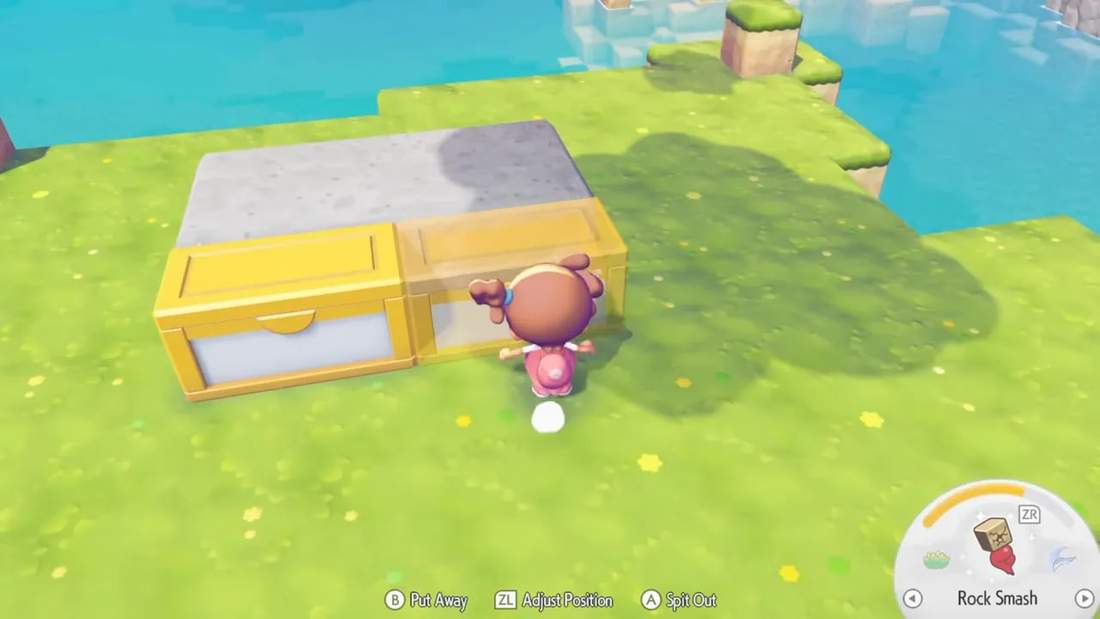
When your workbench is placed outside in the open world, the storage chests need to be directly touching the crafting table in order for the table to use their contents.

If the chests are nearby but not actually touching, the crafting table will not pull from them. Close is not good enough here. They need to be butted right up against the workbench.
A good quick test is to open the crafting menu and then back out. If the connected chest opens and closes, that’s a sign the table is pulling from it.
If your crafting table is inside a preset house
This is where things get much easier.
Inside a preset structure, storage chests do not need to be touching the crafting table. They can be placed elsewhere in the room, and the crafting table will still pull resources from them.
That gives you much more flexibility if you want to make a proper crafting house or resource room.
One important note: from my understanding, this only works with preset buildings, not just any custom-built house structure. Even if a custom build looks like a house, the crafting behavior may not work the same way.
So if your dream setup is a dedicated storage house where all your crafting materials are neatly tucked away and still accessible, preset interiors are the best option for that right now.
Storage Build #1: Stacked stair-step storage
This is the first full storage solution I want to highlight, and it’s incredibly functional. I found this build through Alexia Raye, and it’s one of those setups that immediately makes sense once you see it.
This design is ideal if your main priorities are:
- Easy chest access
- Expandable storage
- Clear item labeling
- Fewer accidental interactions with frames
What you’ll need
- Building blocks of your choice
- Frames
- Storage chests, ideally large ones
You can use whatever blocks fit your style. Stone works fine for a demo build, but wooden blocks or decorative materials can make the final result look much nicer.
How to build it
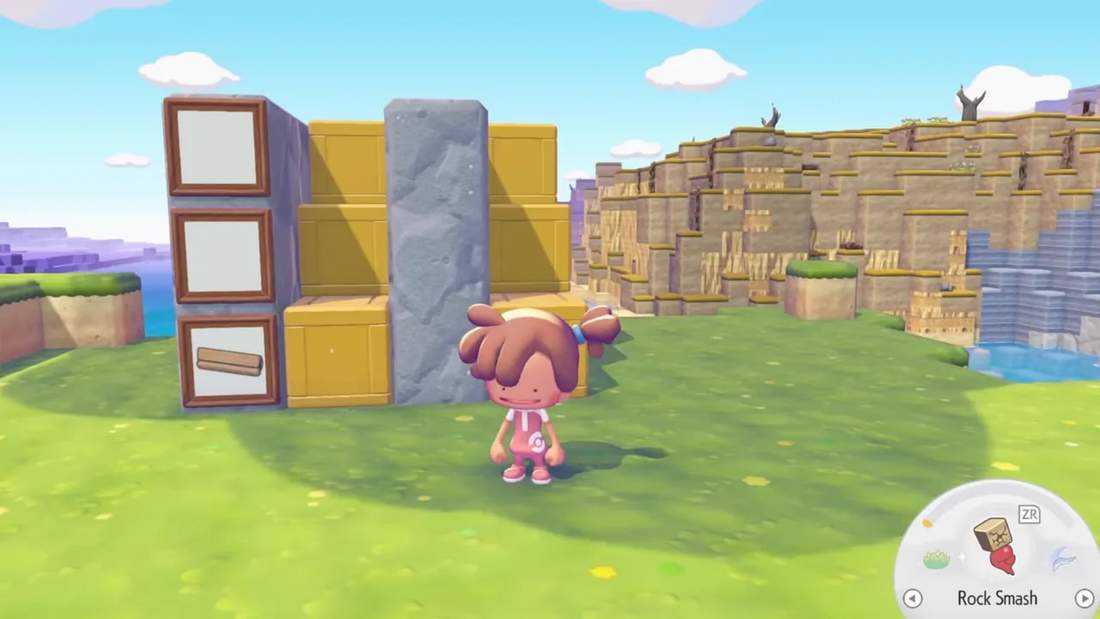
- Create a small pillar or column.
- Add blocks behind and around it to create a narrow support structure.
- Place a storage chest so it sits flush with the front.
- Build up one level higher and place another chest above it in a stair-step pattern.
- Repeat the shape to continue stacking upward.
The result is a vertical storage wall where each chest is easy to jump up to and open individually.
Why this build works so well
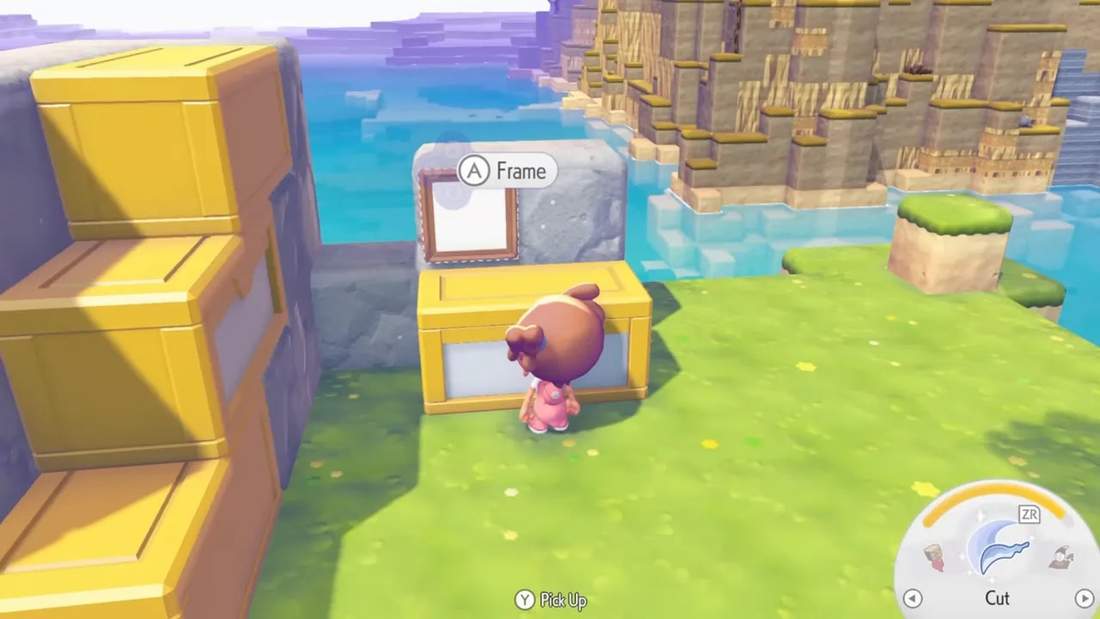
The smartest part of this design is the way it handles frames.
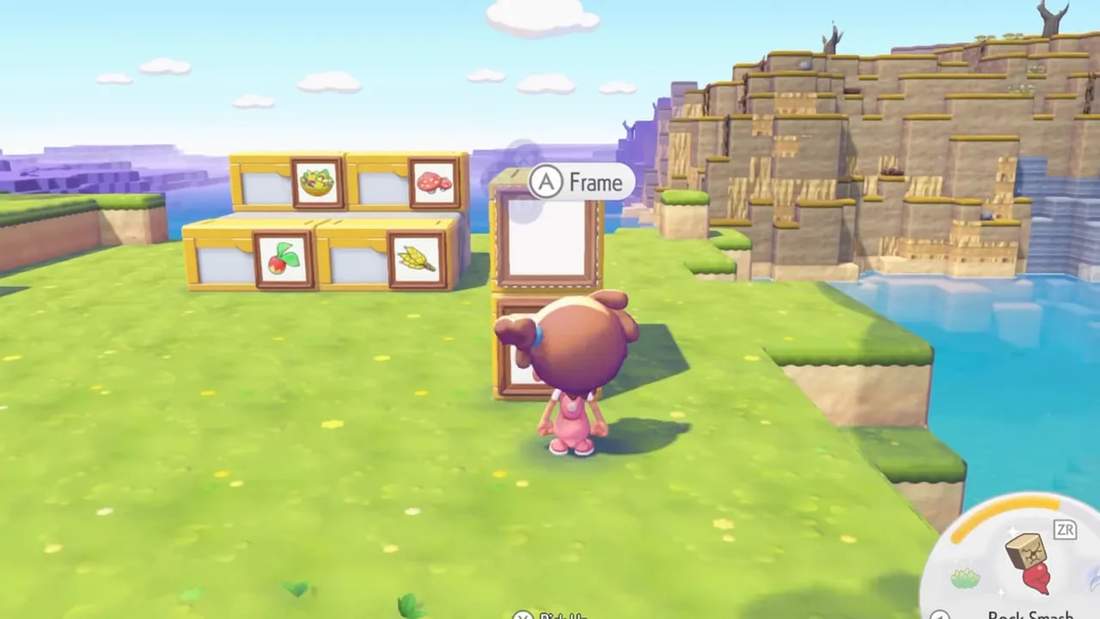
Instead of putting the frame directly on the front of the chest, you place the frame on the column beside it. Then you add an item image to the frame that represents what’s stored in the adjacent chest.
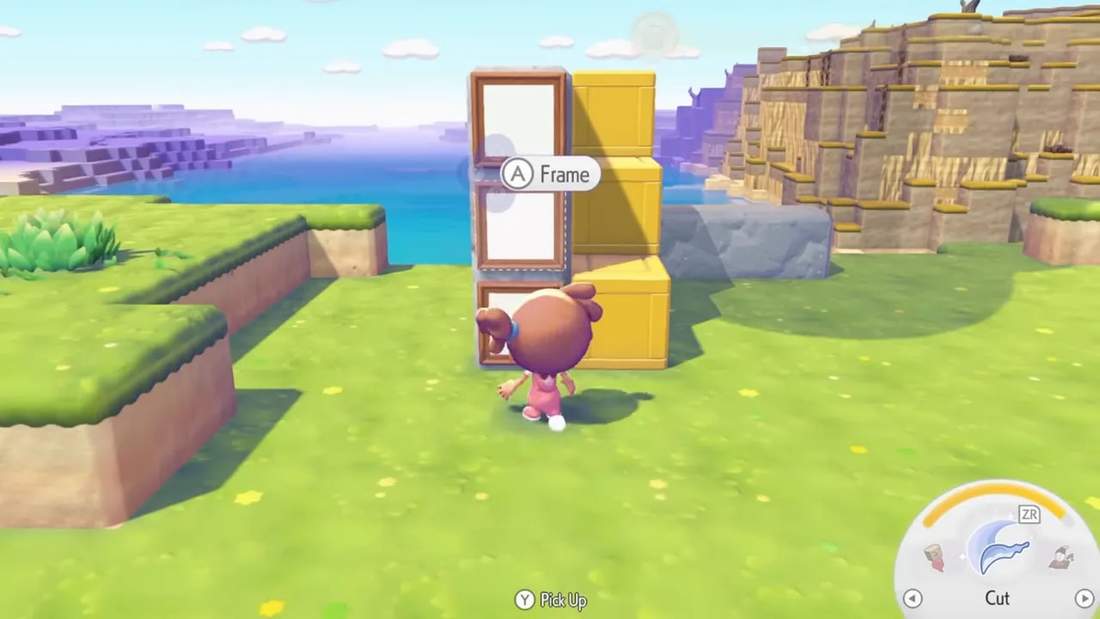
For example:
- A lumber icon in the frame can mark a chest containing lumber
- A flower icon can mark flower storage
- A fossil icon can mark fossil storage
This keeps the frame and chest as separate interaction points, which solves a very annoying problem.
The problem it avoids
If you place a frame directly in front of a chest, the game often highlights the frame first when you try to interact. That means you can end up opening the frame instead of the chest, which gets old very quickly.
Yes, you can switch between nearby interactable objects with your stick, but that’s one extra step every single time. I’d rather not.
With the stacked stair-step setup, you can run up, jump to the chest you want, and access it cleanly without fighting the frame interaction.
How to scale it up
Once you’ve built one section, you just repeat it in a straight row. You can:
- Extend it higher
- Extend it wider
- Build it into a wall or cliff
- Create an entire storage room around it
That flexibility is a huge reason I like this build. It’s not locked into one shape. You can start small and keep adding as your storage needs grow.
Storage Build #2: Platform-style aesthetic storage
If the first setup is for pure function, this one is for my aesthetic girlies and guys.
This storage build is still practical, but it has a cleaner, more display-friendly look. I saw a version of this from Console Caito, who used it in a beautiful underground storage room.
How this build works
You start by creating a simple rectangular platform. For a basic example, you can make it four blocks wide and extend it into a small rectangle.
Then place the storage chests directly on top so they face forward instead of being turned sideways.
After that, place the frames on the front of the chests. That gives you a clean visual label for each container while also making the setup look more intentional and decorative.

Why this one feels nicer visually
Because the chests are front-facing, the whole arrangement looks more like actual designed furniture or shelving rather than a utility wall. If you’re making a themed room, underground vault, or carefully decorated base, this approach blends in better.
It’s also easy to customize. You can:
- Keep them in a single row
- Build them into larger platforms
- Stack them two high
- Create a full wall of labeled storage
The one tradeoff
Because the frame is on the front of the chest, you can still run into the same interaction issue as before if you approach from the wrong angle.
The simple workaround is to access the chest from the opposite side of the frame. That makes the build totally usable, but it is slightly less convenient than the stair-step design.
So if your top priority is smooth interaction, the stacked design wins. If your top priority is style, this one is a great choice.
I also saw a similar stacked aesthetic variation from Kaylaeffie, where chests are arranged in a more decorative wall layout with frames attached to the front. It’s another strong option if you want something pretty without losing organization.
How I organize my own storage
My personal setup is built in Withered Wasteland, and the main reason I put it there is convenience. When I fast travel in, my storage is right next to where I land, so I can immediately dump everything I’ve collected and move on.
That alone makes a huge difference. If storage is annoying to reach, clutter tends to pile up in your inventory because putting things away feels like a chore.
I built my system into a cliff wall, which let me use the space efficiently without needing a huge standalone building. It’s not the prettiest thing in the world, but honestly, it saved my sanity.
Inside, I’ve sorted my chests by item type. Categories include things like:
- Flowers
- Decor
- Comfort items
- Building blocks
- Fossils
- CDs
- Home-building objects
- Toys for Pokémon
And because the structure is expandable, I can just add more chests as needed over time.
The outside is dressed up a bit more, but the inside is all business. That’s a perfectly valid way to build storage, by the way. It does not have to be gorgeous on day one. Functional first is sometimes the move.
A great extra tip: dye your storage chests and frames
If you’ve unlocked Bleak Beach, you also have another fun way to improve your storage setup: dyeing.
You can dye storage chests and frames either by:
- Crafting paint bombs and using them on the item
- Using the in-game painting character to recolor them directly
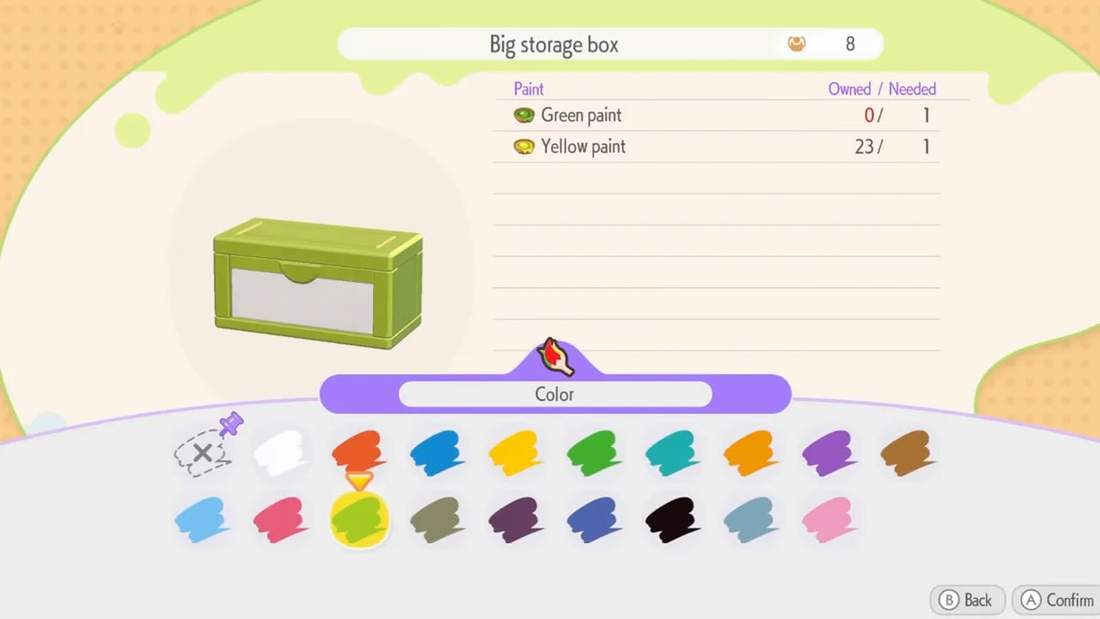
This is such a nice touch if you want your storage to feel more intentional. You can color-code categories, match your room design, or just make the whole setup feel less basic.
For example, you could make:
- Blue chests for crafting materials
- Green chests for nature items
- Matching colored frames for a cohesive look
Even if your actual build is simple, changing the colors can make it feel much more polished.
My best advice for organizing storage in Pokémon Pokopia
If you’re trying to build a storage system that actually stays useful, here’s what I’d prioritize:
- Upgrade to large storage chests as soon as you reasonably can
- Separate crafting resources from general collectibles
- Place crafting chests correctly so your table can pull from them
- Use frames to label chest contents
- Build near a fast travel point if possible
- Choose a layout that matches how you actually play
If you care most about efficiency, the stacked stair-step storage is excellent.
If you care most about looks, the platform-style storage wall is a great fit.
If you’re like me, you might start with function just to survive the inventory chaos, then come back later and build something prettier once you’re deeper into the game.
Final thoughts
Storage in Pokémon Pokopia is one of those systems that seems simple at first, but once the item count starts exploding, having a real plan makes a massive difference.
A good setup saves time, reduces frustration, and makes it so much easier to enjoy building, collecting, and crafting without constantly fighting your inventory.
And truly, that’s the goal. I just want to know where my stuff is, access it quickly, and stop carrying around half the island in my pockets.
Mission accomplished.