

ARC Raiders has a funny habit of making weekly trials feel either completely forgettable or like a full-blown community crisis.
Most weeks, trials are easy. Open some containers. Damage a few specific ARC types. Search some probes. You knock out three stars, collect your blueprint rolls and rare item chances, and move on with your life.
Then there are the other weeks.
The weeks where the entire player base turns into a roving pack of heavily armed lunatics, all sprinting toward the same objective with six figures of gear strapped to their backs. This was one of those weeks. ARC Raiders handed everyone the same weekly challenge, gave us seven days to complete it, and effectively told the whole lobby to go bully the Queen or Matriarch.
It sounds simple until you actually try to do it.
How weekly trials usually work
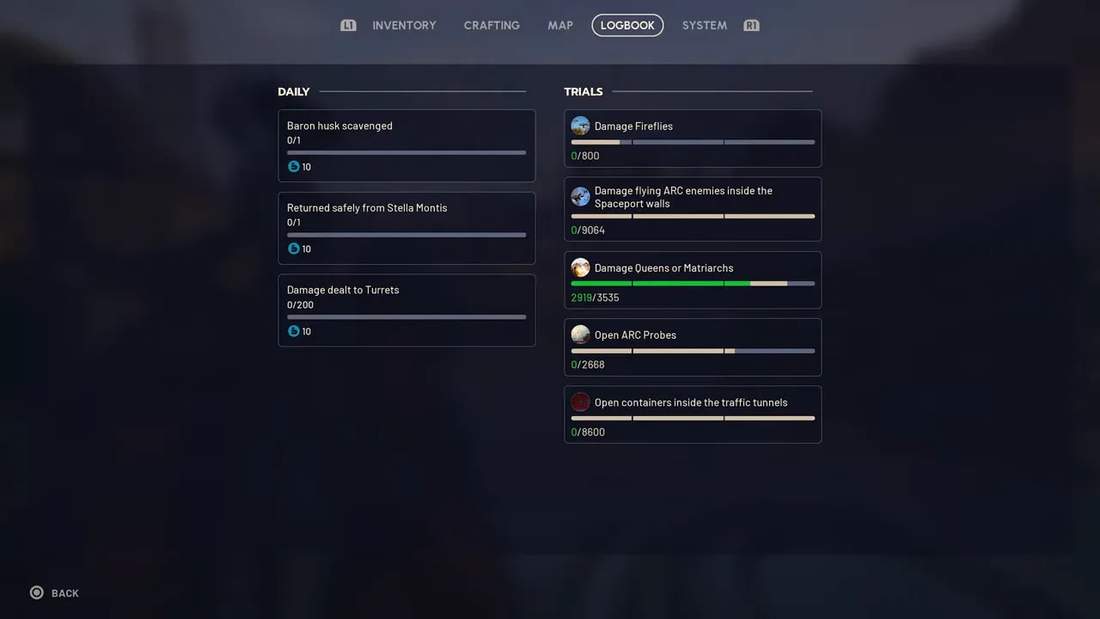
Every week, ARC Raiders gives everyone five identical trials. Outside of projects and expeditions, these are one of the main ways to farm rewards. Some people chase leaderboard points and try to squeeze out every possible score. Most of us are just trying to hit three stars so we can farm blueprints, attachments, and rare loot.
Usually, these tasks are mundane enough that you can clear them almost by accident.
You can grind them in normal daytime raids if you really want to suffer, or you can be smart and use a special map condition for double points. That is almost always the better option if you care about efficiency.
This time, I decided to clear as much as possible in the hurricane playlist before touching the boss damage challenge. That turned out to be the only sane decision I made for a while.
Clear the easy stuff first
If a weekly set includes one trial that is clearly going to become a bloodbath, do not start there. Knock out the free space on the bingo card first.
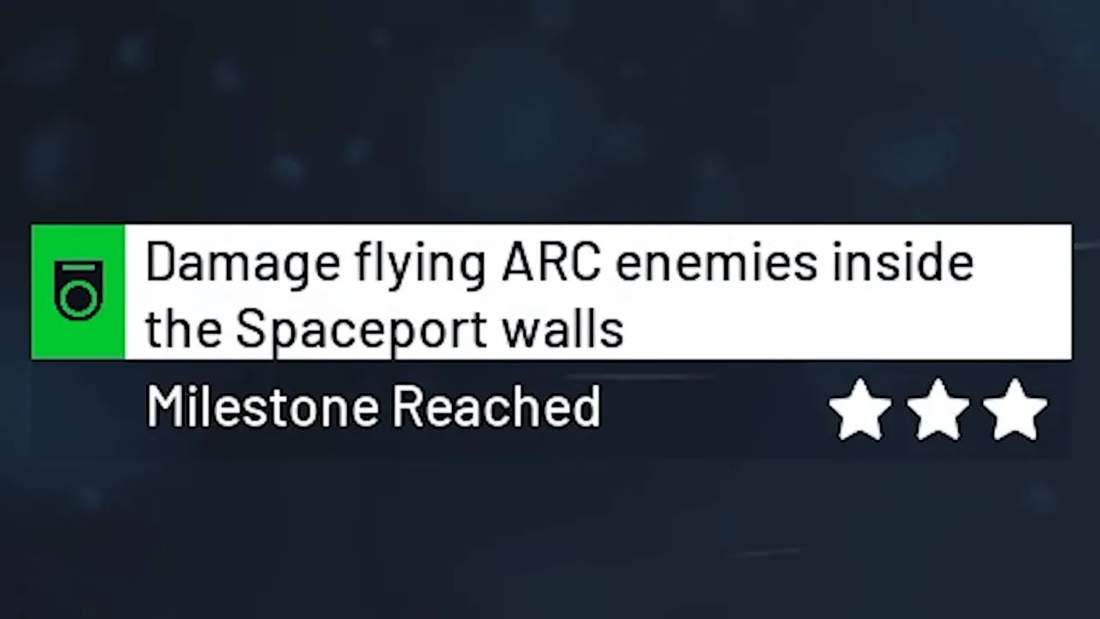
1. Damage flying ARC inside Spaceport walls
This was easy cleanup work. If speed matters, bring seeker grenades and let them do the heavy lifting. There is no reason to overcomplicate this one.
The reward for me was an extended shotgun mag, medium, and some complex gun parts. Not life-changing, but good enough for a task that barely qualified as resistance.
2. Open containers in the traffic tunnels
This challenge sounded more specific than it actually was. “Traffic tunnels” in practice meant pretty much anything inside Bluegate. So if you get this one, do not waste time searching for some tiny, hidden subsection of the map. Just get into Bluegate and start opening everything that is not nailed down.
That run paid out with a muzzle brake, a shotgun choke, and another blueprint I already had. A classic ARC Raiders reward package. Useful, annoying, and a little disrespectful all at once.
3. Damage comets
People love to point out that if you throw a lure grenade at comets, they can basically self-destruct. Which is true. It is also hilarious. It just does not help if you need damage credit.
For that, I would recommend a Hullcracker. It makes the challenge feel like popping an especially irritating metal pimple, and at least in my case, that pimple was filled with more complex gun parts.
4. Search ARC probes
This one was straightforward enough and gave me a reason to stall before the real problem. Because by that point, I was hoping the rest of the lobby had already finished the Queen or Matriarch challenge.
They had not.
Why the Queen and Matriarch trial became a disaster
The boss damage trial created the same problem these things always create, just on a much larger scale.
Everyone who still cared about progression piled into the same activity at the same time. By this point in the season, a lot of those players already had every good gun they wanted, so cost stopped mattering. People were rolling into these raids with insane loadouts, throwing wolf packs and high-end gear at the problem like money had become a decorative concept.
That changes the whole dynamic of the fight.
In a normal lobby, you can approach the Queen or Matriarch methodically. You can pick a role. You can choose your angle. You can get a respectable amount of damage in before the kill happens.
In these lobbies, the boss fight turns into a demolition derby.
I spent three hours chasing the Queen and Matriarch across maps with what felt like twenty very enthusiastic friends, only to keep coming up short when it mattered. It was not for lack of trying either.
- 17 wolf packs
- 4 medium shields
- 37 adrenaline shots
- 3 raider keys
- 312 rounds of Hullcracker and energy ammo
- 3 cans of Vita Spray
- A small pharmacy’s worth of shield rechargers and herbal bandages
All of that, and I still ended up with only two stars.
The loot was good. If you need cores or want to vacuum up the incredible things people leave behind in chaos lobbies, this playlist was fantastic. But if your goal was actually finishing the trial, brute force was not enough.
The first bad strategy: trying to play it like a normal raid
My first instinct was to treat the fight like any other raid. Get in, shoot a lot, loot a bit, and leave once the damage was done.
That does not work when the entire server has made the exact same plan.
At one point I switched to a sniper approach on Spaceport, using a Jupiter and waiting for the Matriarch’s shield to drop so I could hammer the exposed core. In a normal raid, that would have been perfectly reasonable.
Instead, something bizarre happened. Her shield barely seemed to go down at all. My running theory is that if the Matriarch takes too much damage too early, the fight gets weird and the shield logic breaks or changes. Whatever the exact explanation is, the result was the same: she died with the shield still up.
That forced the lobby into the stupidest and most dangerous option available.
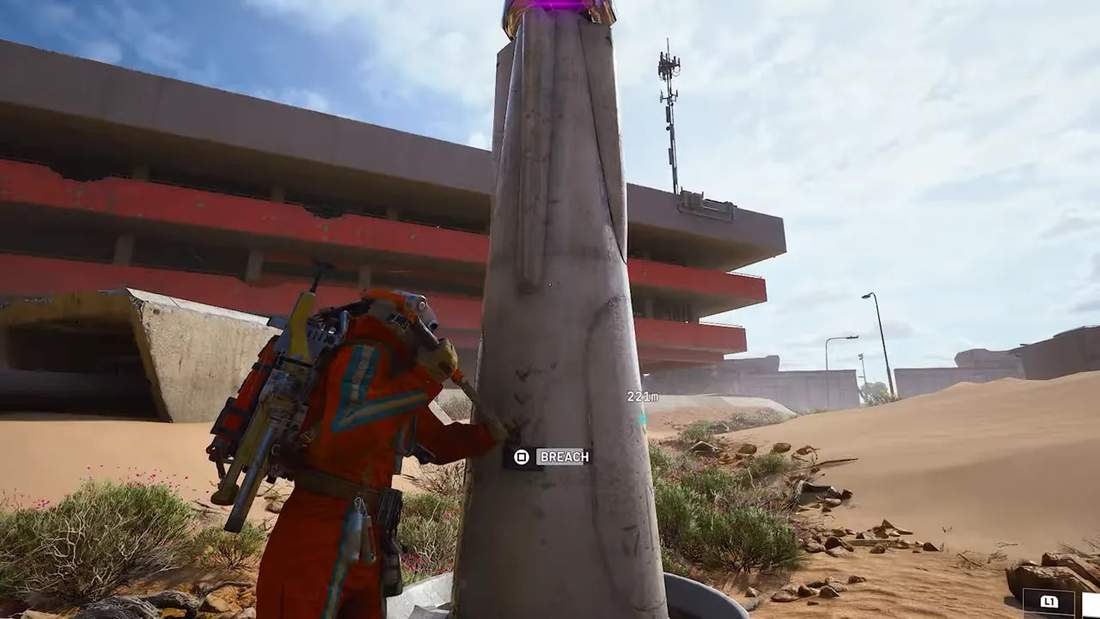
Mount the Matriarch and plant a deadline directly on the core.
Which sounds cool right up until you think about the cost.
The real price of riding the Matriarch
Planting a deadline on top of the Queen or Matriarch is not just risky. It is expensive in a way that makes failure physically irritating.
Before you even get on top, you have to survive the ARC swarm around the boss. That usually means fighting through:
- Rocketeers
- Bastions
- Leapers
- Bombardiers
Unless you have a bag full of wolf packs worth something like $30,000, clearing that mess takes time. And while you are doing it, the rest of the lobby is still unloading into the boss.
Then you need the actual bull-riding kit:
- A snap hook
- A deadline
- A gun strong enough to expose the core if it is still covered
- Ammo
- Healing
- Shield recharge
- A useful augment
By the time you add all of that up, you are looking at a six-figure raid investment just for the privilege of attempting something that is already one of the most dangerous moves in the game.
Then I found the tracking problem
As if the lobby chaos was not enough, there also seemed to be a tracking issue.
On Darn Battlegrounds, I got to the Matriarch early despite a terrible spawn and started putting in work immediately. I had a good lane, decent cover, and damage numbers that looked healthy. By the time the rest of the lobby showed up, I had already been chased, gassed, and set on fire twice, which felt like the game gently encouraging me to reconsider my hobbies.
I stayed inside the shield whenever I could and chipped away with Hullcracker and Jupiter shots. The damage looked good. The run felt good. And when the Matriarch finally went down, I was sure I had the third star.
I did not.
I had logged over 4,000 damage in the fight, but the game credited me with only 2,919.
At that point it stopped feeling like a personal skill issue and started feeling like a global one. I tried asking around, but the lobby was not exactly in a communicative mood. So I reached the obvious conclusion:
If partial damage was not tracking correctly, I needed to stop playing safe and start playing stupid.
The only consistent answer: build for the ride
I crafted and upgraded a Torrente, slapped on an extended mag, packed a deadline, a snap hook, and a cloaking device, and committed to the bit.
This was the point where I finally accepted that if I wanted the third star, I needed to get on top of the Matriarch and contribute damage where the game had no excuse not to notice it.
That led to the next problem.
Everyone else had the exact same idea.
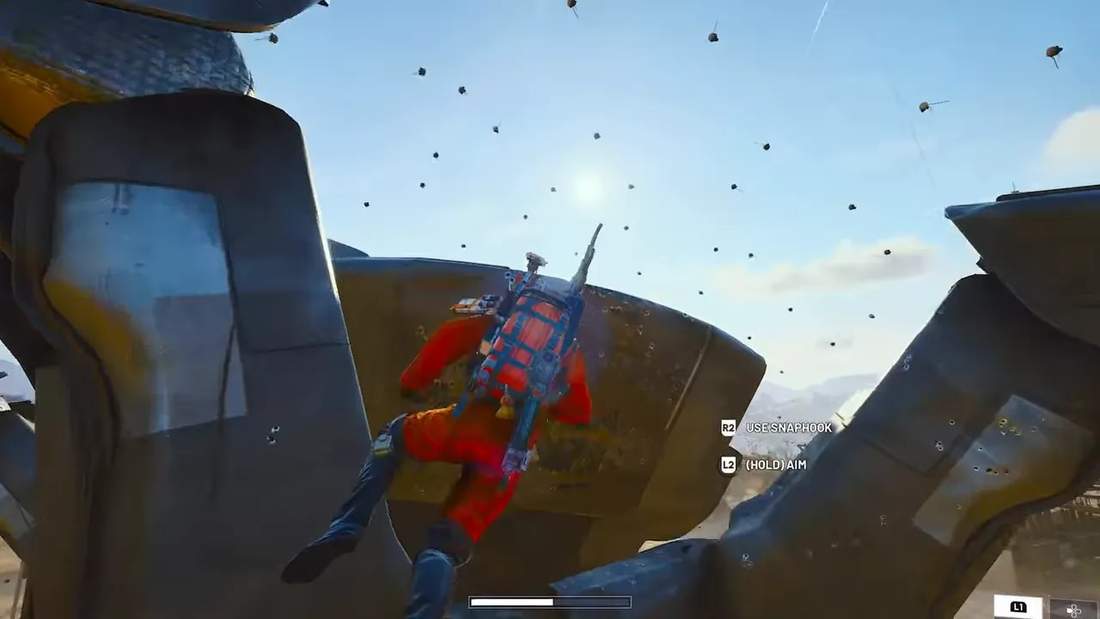
Even with a good spawn, I would arrive at the battlefield to the sound of snap hooks firing and deadlines detonating. The Matriarch was getting absolutely swarmed by players trying to force completion through direct core damage.
On one attempt I actually managed to get up there, start firing, and plant a deadline.
It still was not enough.
I got knocked, revived, burned through more gear, and came out of the whole thing with nothing except a growing hatred for the challenge and a renewed appreciation for how many wolf packs the average raider is willing to spend when pride is on the line.
The raid where everything finally worked
After two days, 27 raids, and enough money spent to buy a small moon, I reached the point every ARC Raiders player eventually reaches.
I stopped caring.
That was, surprisingly, the breakthrough.
On my final run into Darn Battlegrounds, I spawned in with only 17 minutes left on the clock. Normally, that should have sent me sprinting toward extraction. In most raids, the Queen or Matriarch did not live that long. But I was too tilted to think clearly, so I just went to the fight anyway.
And somehow, that was perfect.
The Matriarch was still alive, which meant the lobby had mostly moved on or failed to commit. I had room. I had time. More importantly, I had a plan:
- Get on top with the snap hook.
- Plant the deadline.
- Dump as much damage as possible.
- Run to the hatch.
For once, the entry was clean. I hooked on from behind, reached the top, found the core already exposed, planted the deadline, and bailed.
Then I turned around to admire the explosion because I am not cool enough to ignore one.
The important part is this: that was enough.
The impossible challenge was finally done.
But because my judgment had completely eroded by this point, I climbed back up for more damage anyway.
Why the Torrente suddenly felt like a cheat code
Once I actually committed to using it, the fully upgraded Torrente felt ridiculous.
It has excellent reload speed and, with the right setup, a magazine that holds 102 rounds. For sustained damage on top of the Matriarch, that is incredible. When you have a stable angle on the core and enough bullets to stay there, the gun starts to feel unfair.
I do not know how I had gone so long without using it properly.
By then I was basically running on relief instead of joy, but at least I had the star. I had 27 rounds left, a giant robot under me, and every intention of going out with a little dignity and maybe some dancing.
Instead, I got knocked off by what I am fairly sure was a bombardier.
Honestly, I did not care. The challenge was complete.

The best part of the whole ordeal was not the challenge
I stayed on top of the Matriarch after going down because I thought the scene might make for a good clip later. That was the mindset. Pure resignation and accidental cinematography.
What I had not realized was that someone else was already up there with me.
At first it just turned into a weirdly peaceful moment. Two people hanging out on top of one of the deadliest machines in the game, waiting to see what happened next. Given how ugly the rest of the challenge had been, that was already a nice change of pace.
Then things got even better.
Another player showed up. Then another. One of them was a medic. I assumed they were coming up either to finish the boss or plant a deadline on my skull and move on with their day.
That would have been understandable.
Instead, the medic risked everything to land a defib on me.
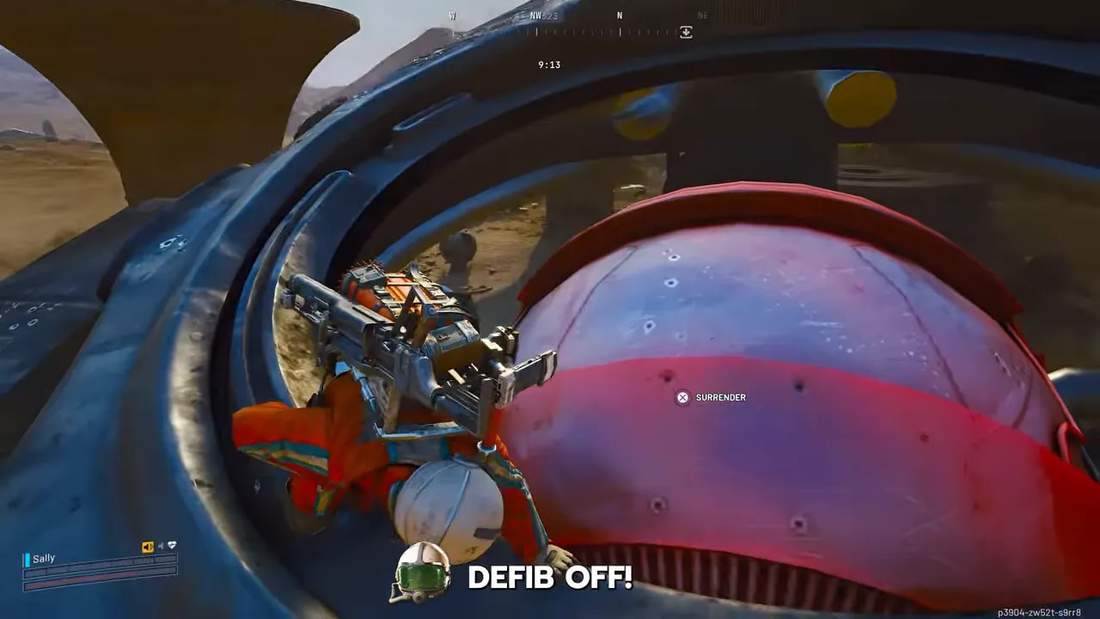
There was absolutely nothing in it for them. My body was worth money. There is no in-game oath compelling anyone to save a random. They just did it because they could.
That was already one of the nicest things I have seen in ARC Raiders. Then we got back on top of the Matriarch and started blasting together.
For about thirty seconds, it was perfect. Just two complete maniacs standing on a giant murder machine, unloading into the core like lifelong friends who had met ten seconds earlier.
Eventually I got bucked off, fell about 30 feet, panic-rolled like Star Fox, and discovered at the worst possible moment that my gun needed a reload. Which was less perfect. But still, the mood had changed.
Loot, gratitude, and one genuinely great random
Once the Matriarch finally exploded into a pile of lootable parts, I decided the only reasonable way to repay the medic was to get them as much loot as possible.
So I started scooping up cores and calling them over. With so few people left at the fight, there was more than enough to go around. I expected the remains to be picked clean, but there was still plenty left.
And then the medic somehow got even better.
After all that, they started giving their loot away to another stranger on the way out.
Not trading. Not negotiating. Just paying it forward.
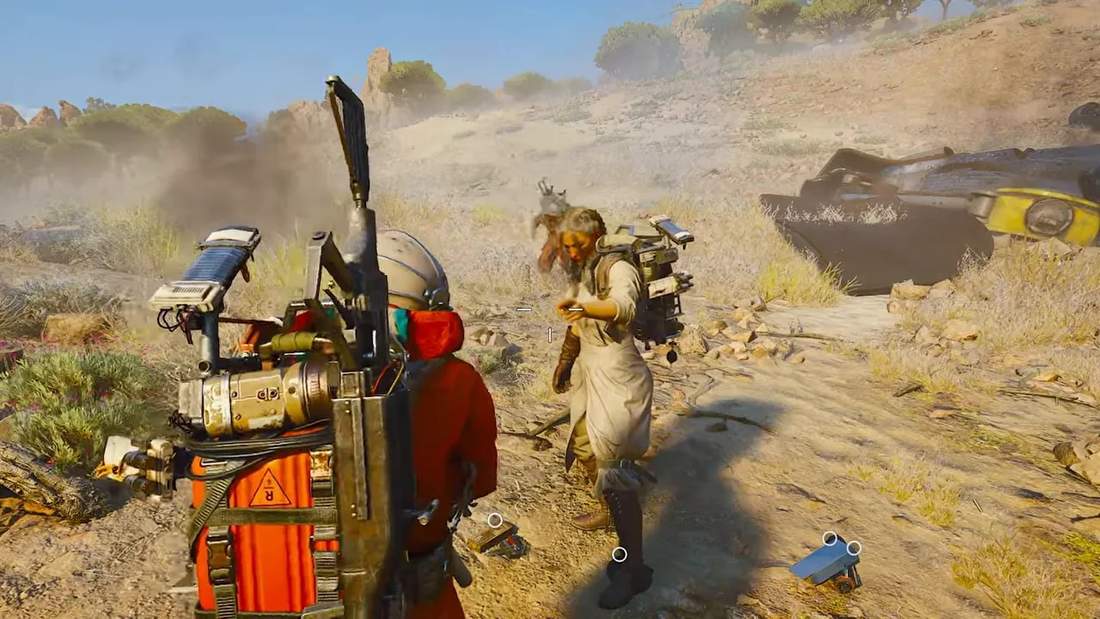
That was the best thing to come out of this whole miserable challenge. Not the third star. Not the boss kill. Not the mountain of gear burned in the process.
It was the reminder that for every rat in Speranza, there is still the occasional random who will revive you for no reason, help you finish the job, and then hand their earnings to somebody else on the walk to extraction.
If you are trying to finish this trial, here is what I would actually do
After all the pain, a few lessons were painfully clear.
Prioritize the easy weekly trials first
Do the simple stuff during map conditions with double points. Save the Queen or Matriarch challenge for after you have already locked in progress elsewhere.
Do not expect normal fight pacing
If the entire player base is chasing the same boss challenge, the lobby will be chaotic. Assume the fight will end fast, attract everyone, and burn resources at an absurd rate.
Bring gear specifically for core damage
Safe poke damage may not be enough, especially if tracking gets weird. If you want consistency, bring equipment that lets you get onto the boss and hit the core directly.
Consider a snap hook and deadline mandatory
If the challenge revolves around meaningful Matriarch or Queen damage, these are not luxury items. They are your ticket into the only part of the fight that may reliably count.
The Torrente is excellent for this
Fully upgraded, with the large mag, it is absurdly good for sustained damage once you get on top.
Late raids can be your friend
If the lobby has already thinned out and the boss is somehow still alive, you may have a better chance than you would in the opening chaos.
And the reward?
After all of that, the reward waiting at the end of the rainbow was two power rods.
Which felt exactly as insulting as it sounds.
Still, the third star was done, the impossible challenge was over, and I got a better story out of it than I got loot. In ARC Raiders, that is not always a bad trade.
Hopefully next week is easier.
It probably will not be.